BitNinja Security Starting Point - A Short Educational Program
Here at BitNinja we think that cyber security should be simple. So, we’ve designed BitNinja to make your life easier. We’ve built features and capabilities that can greatly simplify your work.
Here is a short guide to our product with tips and helpful hints. These educational articles should help you properly utilise BitNinja's features to grow your company while having a clear understanding of how it works!
1. Network Attacks - What are they and how can you filter them with BitNinja?
2. Malware Detection - Set up, schedule, catch and quarantine with BitNinja
3. WAF- Managing patterns and testing the BitNinja WAF
4. IP filtering - Blacklists, whitelists, greylists and the BitNinja logic
In this article you will get to know more about:
The most effective way to block website cyberattacks is at the application layer using a Web Application Firewall (WAF). It's a good protection shield against common web hacks, like injection flaws (eg. SQL injection), cross-site scripting (XSS), session hijacking, remote and local file inclusions and other attacks.
Generally speaking, WAF monitors, filters, and blocks incoming and outgoing traffic on HTTP protocol.
The BitNinja WAF 2.0 gives users more control than usual. It’s customizable on rule and domain levels: it allows you to set custom level protection for each website on the same server and configure the filter level by domain.
Now, the BitNinja WAF is not active by default, it needs to be enabled.
The steps are very simple:
BitNinja WAF 2.0 will be activated within a few minutes.
❗ Important note about ports ❗
IMPORTANT: Please make sure that the ports required by BitNinja are open, otherwise the WAF module will not work properly. You can find them here. Additionally, the web server has to accept connections from 127.0.0.1 to http://:80 and to https://:443 in order for the WAF module to work.
Our WAF Module has more than 180 available rules that you can use to protect your website. You are free to poke around and experiment with them to see what works best for you. Or if you are more the enable and forget type, we do have 3 predefined rulesets that will most definitely suit your needs.

Each of these rulesets includes certain rules for the Web Application firewall that offers protection against various attacks, such as SQL Injections, Cross Site Scripting and more.
The higher risk you are setting, the more rules will be enabled as it may trigger normal interactions as an attack.
Out of the box, BitNinja will use a ruleset that is set to the lowest possible false positive rate. Of course you can adjust this to your needs. For example, you can:

Here comes the question, how to make sure that the WAF actually doing its job.
How to test the WAF?
This is actually pretty easy. Once you have WAF 2.0 activated, simply visit one of the domains on your server such as http://[domain of any sites]/info.php?file=/etc/passwd
Prevent the action being executed along with triggering the WAF and you should see a page that shows that you have been blocked.

The IP will be put on a greylist and flagged as a possible attack against your server. After a refresh or clicking on the IP/Domain in the header, you can delist the IP address by solving the Captcha.
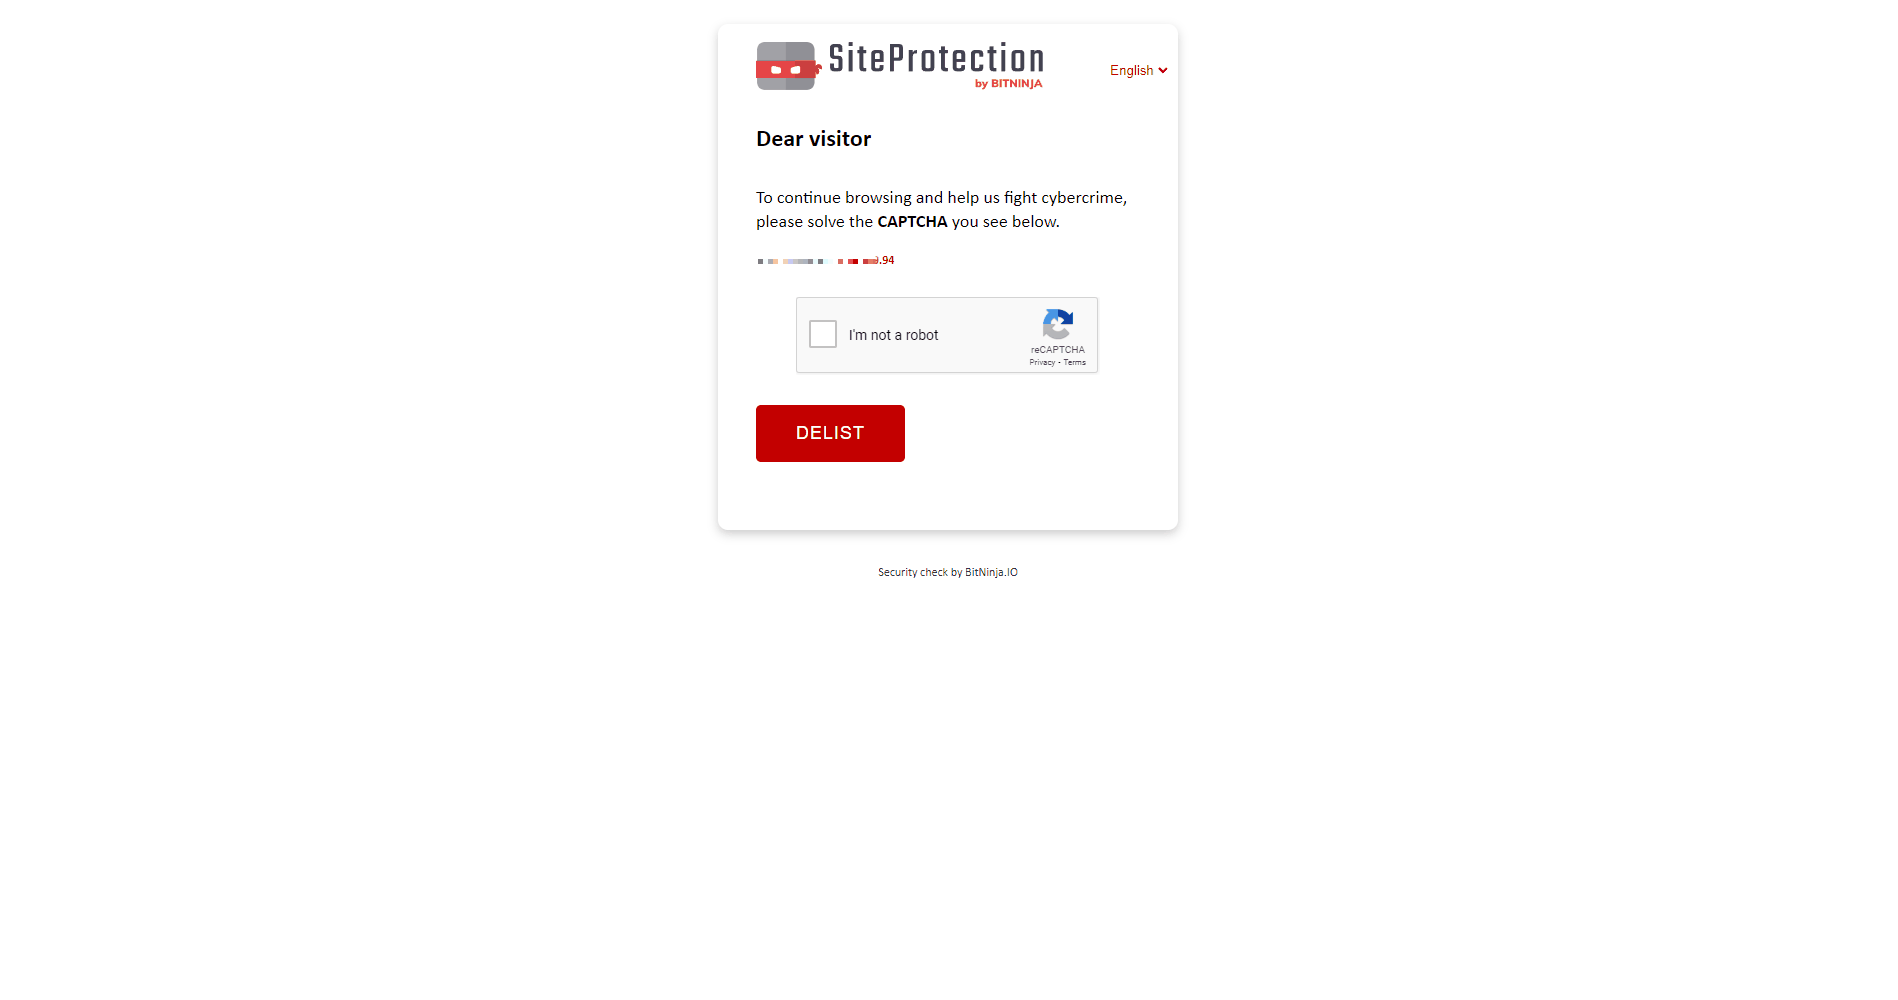
Of course, in case the attacker IP is blacklisted, this is not possible, as the server will not be reachable.
When the WAF is triggered under the Network Attacks, you will see lines like this:

📌 You can find the technical details and customizations here: Documentation - Web Application Firewall 2.0