BitNinja Security Starting Point - A Short Educational Program
Here at BitNinja we think that cyber security should be simple. So, we’ve designed BitNinja to make your life easier. We’ve built features and capabilities that can greatly simplify your work.
Here is a short guide to our product with tips and helpful hints. These educational articles should help you properly utilise BitNinja's features to grow your company while having a clear understanding of how it works!
1. Network Attacks - What are they and how can you filter them with BitNinja?
2. Malware Detection - Set up, schedule, catch and quarantine with BitNinja
3. WAF- Managing patterns and testing the BitNinja WAF
4. IP filtering - Blacklists, whitelists, greylists and the BitNinja logic
In this article you will get to know more about:
Malware is the short version of the word “Malware Software”. It’s generally intended to cause damage, harm, track data or give remote access to hackers. They are a real headache, which is why BitNinja can help you here.
One way that cybercriminals can access a server is by using a backdoor. Backdoors are typically installed as malware, and it’s essential to block and remove the infected malware file as soon as possible.
💎 Structure Analysis
The latest threat to server security is obfuscated malware. Traditional malware detection can’t find these infected files. That’s why we analyze the structure of the code, which helps us eliminate more sophisticated malware.
The scan will identify various malwares and backdoors that are spying on you and your customers.
The tool we are using (inotify-tools or auditd) is looking for any file changes, so whenever an attacker targets your website using malware files the BitNinja MalwareDetection module will be there waiting to catch that. You can also trust us with root cause analysis: our Defense Robot finds the backdoor and the attacking IP, block the attack and prevent any further infections on the server.
BitNinja automatically checks for file-changes, but you may also do Manual Scans from CLI or the Dashboard. It is also possible to restrict the scan to a custom folder.
Using the Command-Line Interface:
Command: bitninjacli --module=MalwareScanner --scan=/var/www
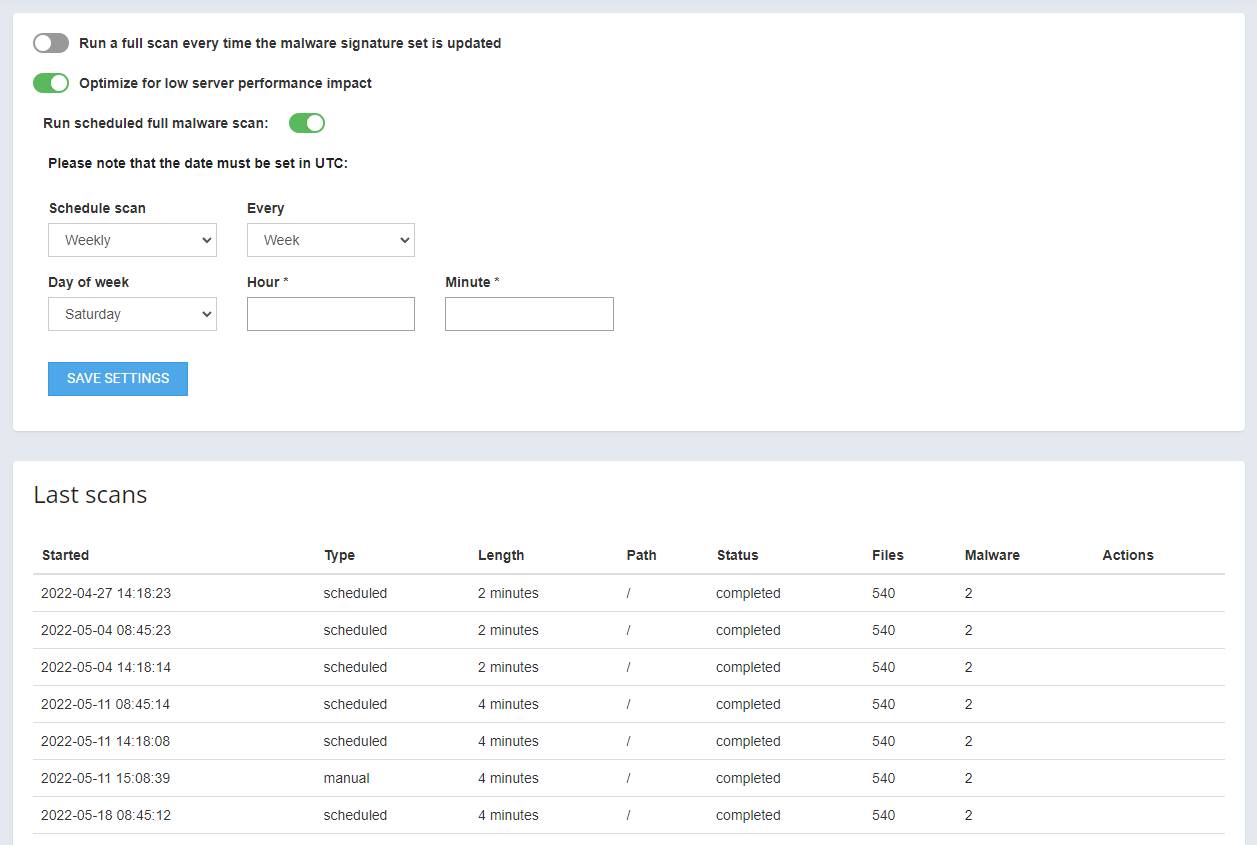
Using the Dashboard:
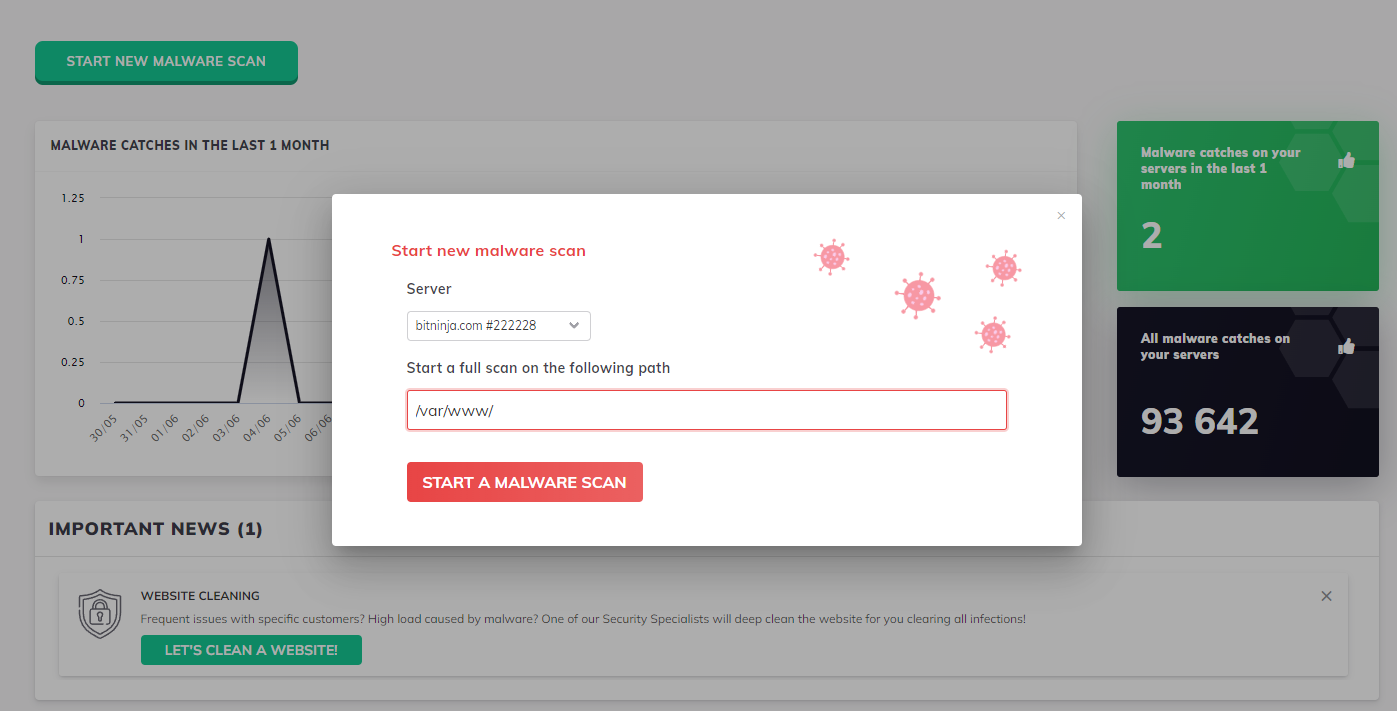
For example, running a Malware Scan immediately after you have installed BitNinja on the server is an excellent idea.
You may also schedule Malware scans every week on specific weekdays. Using Cron Jobs you can also do the same more frequently, that is your choice.
You can create your own user level signatures on the Local Malware Signatures page.This is useful in many ways: you can detect infections that are not catalogued in BitNinja’s database, and if you are being targeted by a specific type of malware, you can fight it head-on. You can also publish malware files on your own servers that you believe are dangerous.
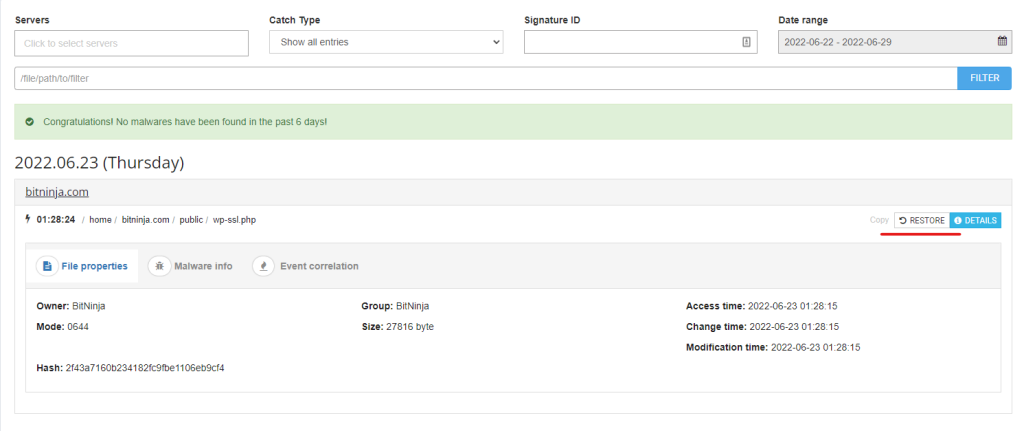
On the Anti-Malware Overview page you will see Catches, e.g. the number of incidents that occurred on your account. We offer a lot of flexibility and control Catches. BitNinja cleans critical malware files, but there is an option for getting only reports of malware catches. With our approach, you can see every infection cleaned by BitNinja across your servers.
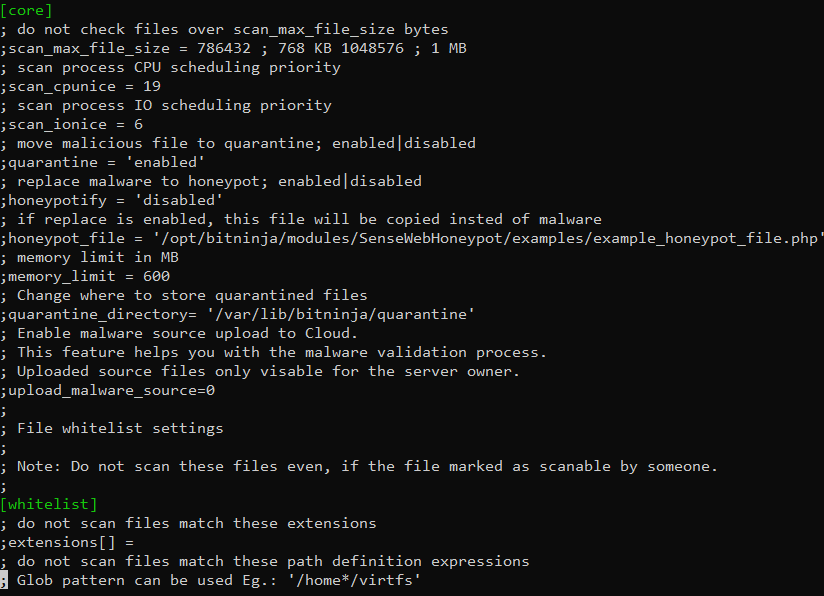
As every module is customizable, MalwareDetection also comes with some options under the hood.
Similar to scans, restoring files from quarantine can be done both from CLI or the Dashboard.
Command: bitninjacli --restore=/path/to/file
📌 You can find the technical details and customizations here: Documentation - MalwareDetection